The Hadoop framework is written in Java, and its services require a compatible Java Runtime Environment (JRE) and Java Development Kit (JDK). Use the following command to update your system before initiating a new installation:
rk@ubuntu:~$ sudo apt update
At the moment, Apache Hadoop 3.x fully supports Java 8 or more. The OpenJDK package in Ubuntu contains both the runtime environment and development kit.
rk@ubuntu:~$ sudo apt-get install default-jdkThe OpenJDK or Oracle Java version can affect how elements of a Hadoop ecosystem interact. To install a specific Java version, check out the installation process is complete
rk@ubuntu:~$ java -version; javac -version
Install the OpenSSH server and client using the following command:
rk@ubuntu:~$ sudo apt install openssh-server openssh-client -yCreate Hadoop User
Utilize the adduser command to create a new Hadoop user:
rk@ubuntu:~$ sudo adduser hduserThe username, in this example, is hduser. You are free the use any username and password you see fit. Switch to the newly created user and enter the corresponding password:
rk@ubuntu:~$ su - hduser
Enable Pass-wordless SSH for Hadoop User
Generate an ssh keypair using keygen as shown :
hduser@ubuntu:$ ssh-keygen -t rsa -P '' -f ~/.ssh/id_rsaUse the cat command to store the public key as authorized_keys in the ssh directory:
hduser@ubuntu:$ cat ~/.ssh/id_rsa.pub >> ~/.ssh/authorized_keysSet the permissions for your user with the chmod command:
hduser@ubuntu:$ chmod 0600 ~/.ssh/authorized_keys
The new user is now able to SSH without needing to enter a password every time. Verify everything is set up correctly by using the hduser user to SSH to localhost:
hduser@ubuntu:$ ssh localhost Download and Install Hadoop on Ubuntu
Visit the official Apache Hadoop project page, and select the version of Hadoop you want to implement.
Use the provided mirror link and download the Hadoop package with the wget command:
wget https://downloads.apache.org/hadoop/common/hadoop-3.3.0/hadoop-3.3.0.tar.gz
Once the download is complete, extract the files to initiate the Hadoop installation:
tar xzf hadoop-3.3.0.tar.gz
Single Node Hadoop Deployment
(Pseudo-Distributed Mode)
To explore basic commands or test applications, you can configure Hadoop on a single node pseudo-distributed mode, allows each Hadoop daemon to run as a single Java process. A Hadoop environment is configured by editing a set of configuration files:
-
bashrc
-
hadoop-env.sh
-
core-site.xml
-
hdfs-site.xml
-
mapred-site-xml
-
yarn-site.xml
Configure Hadoop Environment Variables (bashrc)
Edit the .bashrc shell configuration file using a text editor of your choice (we will be using nano):
hduser@ubuntu:~/hadoop-3.3.0$ sudo nano ~/.bashrc
Define the Hadoop environment variables by adding the following content to the end of the file:
#Hadoop Related Options
export HADOOP_HOME=/home/hduser/hadoop-3.3.0
export HADOOP_INSTALL=$HADOOP_HOME
export HADOOP_MAPRED_HOME=$HADOOP_HOME
export HADOOP_COMMON_HOME=$HADOOP_HOME
export HADOOP_HDFS_HOME=$HADOOP_HOME
export YARN_HOME=$HADOOP_HOME
export HADOOP_COMMON_LIB_NATIVE_DIR=$HADOOP_HOME/lib/native
export PATH=$PATH:$HADOOP_HOME/sbin:$HADOOP_HOME/bin
export HADOOP_OPTS="-Djava.library.path=$HADOOP_HOME/lib/native"
Once you add the variables, save and exit the .bashrc file.
It is vital to apply the changes to the current running environment by using the following command:
hduser@ubuntu:~/hadoop-3.3.0$ source ~/.bashrcEdit hadoop-env.sh File
The hadoop-env.sh file serves as a master file to configure YARN, HDFS, MapReduce, and Hadoop-related project settings.
When setting up a single node Hadoop cluster, you need to define which Java implementation is to be utilized. Use the previously created $HADOOP_HOME variable to access the hadoop-env.sh file:
hduser@ubuntu:~/hadoop-3.3.0$ sudo nano $HADOOP_HOME/etc/hadoop/hadoop-env.sh
Uncomment the $JAVA_HOME variable (i.e., remove the
# sign) and add
the full path to the OpenJDK installation on your system. If you have
installed the same version as presented in the first part of this
tutorial, add the following line:
export JAVA_HOME=/usr/lib/jvm/java-8-openjdk-amd64If you need help to locate the correct Java path, run the following command in your terminal window:
which javacThe resulting output provides the path to the Java binary directory.
Use the provided path to find the OpenJDK directory with the following command:
readlink -f /usr/bin/javacThe section of the path just before the /bin/javac directory needs to be assigned to the $JAVA_HOME variable.
how to install sudobersEdit core-site.xml File
The core-site.xml file defines HDFS and Hadoop core properties.
To set up Hadoop in a pseudo-distributed mode, you need to specify the URL for your NameNode, and the temporary directory Hadoop uses for the map and reduce process.
Open the core-site.xml file in a text editor:
hduser@ubuntu:~/hadoop-3.3.0$ sudo nano /home/hduser/hadoop-3.3.0/etc/hadoop/core-site.xml Add the following configuration to override the default values for the temporary directory and add your HDFS URL to replace the default local file system setting:
<configuration>
<property>
  <name>hadoop.tmp.dir</name>
  <value>/home/hduser/tmpdata</value>
</property>
<property>
  <name>fs.default.name</name>
  <value>hdfs://127.0.0.1:9000</value>
</property>
</configuration>
Edit hdfs-site.xml File
The properties in the hdfs-site.xml file govern the location for storing node metadata, fsimage file, and edit log file. Configure the file by defining the NameNode and DataNode storage directories.
Additionally, the default dfs.replication
value of 3 needs to be changed to 1
to match the single node setup.
Use the following command to open the hdfs-site.xml file for editing:
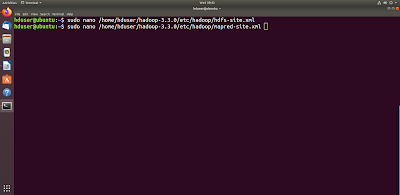
hduser@ubuntu:~/hadoop-3.3.0$ sudo nano /home/hduser/hadoop-3.3.0/etc/hadoop/hdfs-site.xml Add the following configuration to the file and, if needed, adjust the NameNode and DataNode directories to your custom locations:
<configuration>
<property>
  <name>dfs.data.dir</name>
  <value>/home/hduser/dfsdata/namenode</value>
</property>
<property>
  <name>dfs.data.dir</name>
  <value>/home/hduser/dfsdata/datanode</value>
</property>
<property>
  <name>dfs.replication</name>
  <value>1</value>
</property>
</configuration>
Edit mapred-site.xml File
Use the following command to access the mapred-site.xml file and define MapReduce values:
hduser@ubuntu:~$ sudo nano /home/hduser/hadoop-3.3.0/etc/hadoop/mapred-site.xmlAdd the following configuration to change the default MapReduce framework name value to yarn:
<configuration>
<property>
  <name>mapreduce.framework.name</name>
  <value>yarn</value>
</property>
</configuration>
Edit yarn-site.xml File
The yarn-site.xml file is used to define settings relevant to YARN. It contains configurations for the Node Manager, Resource Manager, Containers, and Application Master.
Open the yarn-site.xml file in a text editor:
hduser@ubuntu:~$ sudo nano /home/hduser/hadoop-3.3.0/etc/hadoop/yarn-site.xmlAppend the following configuration to the file:
<configuration>
<property>
  <name>yarn.nodemanager.aux-services</name>
  <value>mapreduce_shuffle</value>
</property>
<property>
  <name>yarn.nodemanager.aux-services.mapreduce.shuffle.class</name>
  <value>org.apache.hadoop.mapred.ShuffleHandler</value>
</property>
<property>
  <name>yarn.resourcemanager.hostname</name>
  <value>127.0.0.1</value>
</property>
<property>
  <name>yarn.acl.enable</name>
  <value>0</value>
</property>
<property>
<name>yarn.nodemanager.env-whitelist</name> <value>JAVA_HOME,HADOOP_COMMON_HOME,HADOOP_HDFS_HOME,HADOOP_CONF_DIR,CLASSPATH_PERPEND_DISTCACHE,HADOOP_YARN_HOME,HADOOP_MAPRED_HOME</value></property>
</configuration>


No comments:
Post a Comment